Calendar
|
|
April '24 | |||||
| Mon | Tue | Wed | Thu | Fri | Sat | Sun |
| 1 | 2 | 3 | 4 | 5 | 6 | 7 |
| 8 | 9 | 10 | 11 | 12 | 13 | 14 |
| 15 | 16 | 17 | 18 | 19 | 20 | 21 |
| 22 | 23 | 24 | 25 | 26 | 27 | 28 |
| 29 | 30 | |||||
Quicksearch
Archives
Syndicate This Blog

Categories
Blog Administration
Powered by
Lizenz/License
Der Inhalt dieses Blogs ist © Copyright 2009 Ralf Ertzinger. Jegliche Reproduktion und Wiederverwertung nur mit schriftlicher Genehmigung des Autors.
The content of this blog is © Copyright 2009 Ralf Ertzinger.
Sunday, July 15. 2012
Creating a throwaway browser
Sunday, July 1. 2012
Installing CentOS 6 from a rescue system
Sunday, August 21. 2011
Installing RedHat 1.1 (Mother's Day + 0.1)
Sunday, March 21. 2010
Building a multi OS USB boot stick, Part 1 (Windows)
Among the things I carry around is always a collection of USB sticks, for various purposes. One of those is usually dedicated to a Linux rescue system, in order to get somehow broken systems back on their feet.
While it is possible these days to access non Linux systems from a booted Linux system any repair work beyond simple text file editing and file copying usually requires OS specific tools to get the job done. Thus it would be nice not only to have a Linux rescue system at hand, but a Windows one as well. And Solaris, while we're at it. And possibly some more.
USB sticks are cheap, at least in this part of the world. 10EUR will get you 4GB off the shelf in almost any electronics store, a little more money will get you 8GB ordered online. So space is not really an issue.
Actually installing an operating system in a way that allows it to boot off a removable media requires some specific preparations and tools in each case. This means that a running instance of that specific OS is needed to prepare the installation. This means that to get Windows to boot of an USB stick a running Windows installation is needed. The same goes for Solaris and Linux.
Preparations
The USB stick used for this exercise is a 4G Sandisk. This procedure will delete all data currently on the stick, so either make sure there is nothing of any interest on it, or just get a new one.
The initial plan is to have Windows, Linux and Solaris boot off the stick. Each OS will get it's own partition, to keep possible clashes between the files of each system to a minimum (and because Solaris wants and UFS partition, but more on that later).
Installing Windows on USB
The standard Windows installer does not allow for installation on USB devices. The standard tool for those tasks is BartPE, a free tool to create so-called Preinstalled Environments. Those are actually a Microsoft supported way to preinstall an operating system on a PC, which is used by system builders to deliver machines with the OS already installed but not registered. The Microsoft tools to create these environments are not easily available, though, and this is where BartPE came in a few years ago. It's original purpose was to create Live CDs of Windows, but booting from USB was added (experimentally) later.
While BartPE is a very valuable tool there is an even better one for this special purpose: The Ultimate Boot CD for Windows, which is basically a BartPE with a lot of useful tools already tacked to the side, and a completely reworked USB installer.
To use UBCD the following is needed:
- The UBCD installer, which weighs in at 255MB and is available from the projects site
- A Windows XP install CD (32 bit)
- Service Pack 3 for XP, if the Windows CD does not already include it
- A license for the Windows version (this is more a legal than a technical problem, but the Windows install on the USB stick needs a separate license to be legal)
- Drivers
The last point is especially interesting. UBCD will take all drivers whichare contained in the Windows XP install CD, which, as everyone knows who tried to install XP on a reasonably recent machine, is not exactly much. While the USB installed will boot (hopefully), access to hard disk drives on the machine or access to network interfaces may be severely limited due to missing drivers.
UBCD already comes with a largeish selection of updated drivers for mass storage, LAN and WLAN, so simply building an image with the default settings has a good chance of working on a large number of modern machines (although the WLAN drivers are disabled by default).
Install procedure
- Make a copy of the Windows XP CD (that is, just copy all the files on it into a folder on the hard disk drive)
- If the CD did not already contain a Windows copy patched to SP3 download the SP3 install package from Microsoft, and slipstream the Service Pack into the copied files
- Install UBDC
- Start UBCD and enter the path to the copied Windows CD in the first field
- Set Media Output to None
- Click "Build"
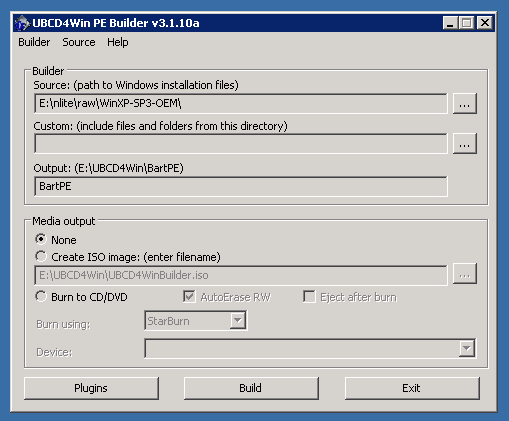
This will start a build process with the default settings, which are reasonable for a first build. UBCD is very customizable, most of the options are available by clicking the "Plugins" button on the main screen. Describing the various things that can be done here is beyond this text, but the UBCD home page has details on this.
After the build has finished plug in the USB stick and start ubusb.exe from the UBCD install folder. To make things easier make sure no other USB mass storage devices are connected. Set the options to match those in the screenshot below. Specifically:
- Make sure the right USB device is selected
- Set the partition size to 2048MB (or 2GB)
- Set the file system to FAT32-LBA
- Set the Boot Loader to grub4dos
- Select the right BartPE folder (although it should pick up the correct one automatically)
- Don't create a CD image
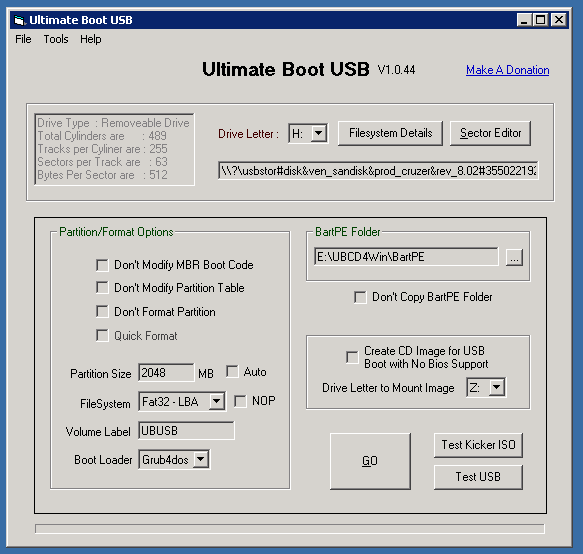
Clicking "Go" will start the process of repartitioning, formattingand copying of data to the USB stick. This may take a while.
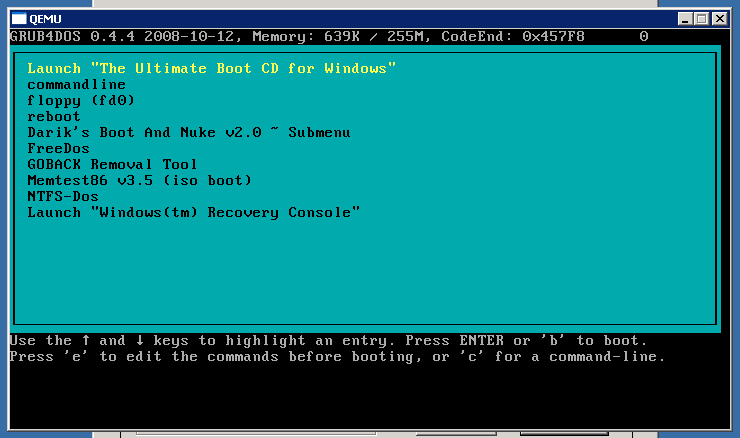
After the process has finished (hopefully successful) the resulting USB stick can immediately be tested, because UBCD comes with a copy of qemu, which can emulate a PC. Just click the "Test USB" button, and a virtual PC will try to boot off the USB stick just created.
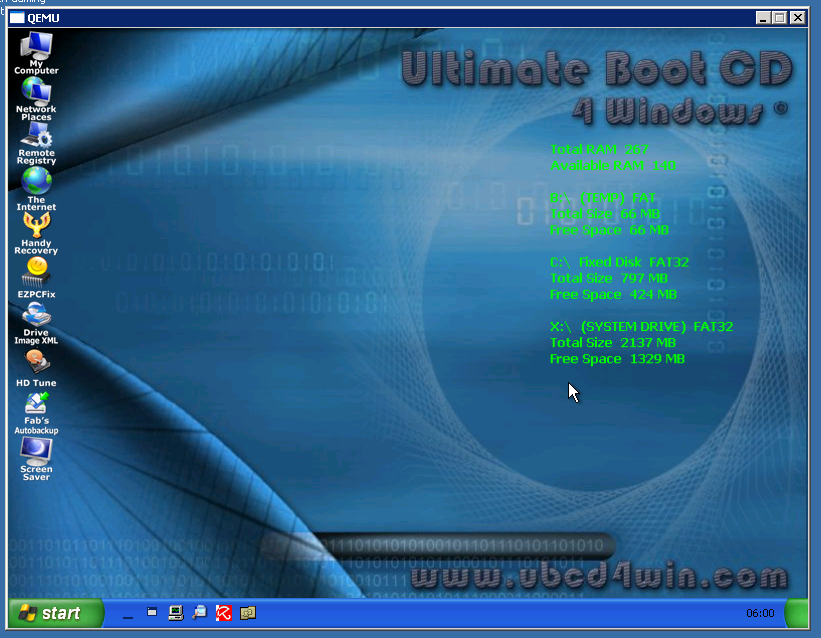
One down, two to go.